
Getting Started
Install Munk AI, verify your environment, run your first workflow, and learn the core commands and Web UI entry.
This guide helps you go from a fresh install to your first successful Munk AI session in the local Web UI, then gives you a quick map of the commands you will use most often.
What you will do
In this guide, you will:
- Install Munk AI
- Check that your local environment is ready
- Launch your first local Web UI session
- Learn what the core commands are for
Install Munk AI
curl -fsSL https://get.munk.sh | sh
After installation, verify that the munk command is available in your shell.
You can also quickly check the installed version:
munk version
Check your environment
Run:
munk doctor
Use this step to confirm that your local runtime, dependencies, and basic verification environment are ready before you start a more involved workflow.
Launch the Web UI
The recommended first experience is to launch the local service and open the Web UI:
munk serve --host 127.0.0.1 --port 16888
Then open:
http://127.0.0.1:16888/
This path is the easiest way to get familiar with Munk AI before moving into formal execution workflows.
The screenshots below give you a quick tour of the main Web UI flow. A good first pass is to move through them in this order:
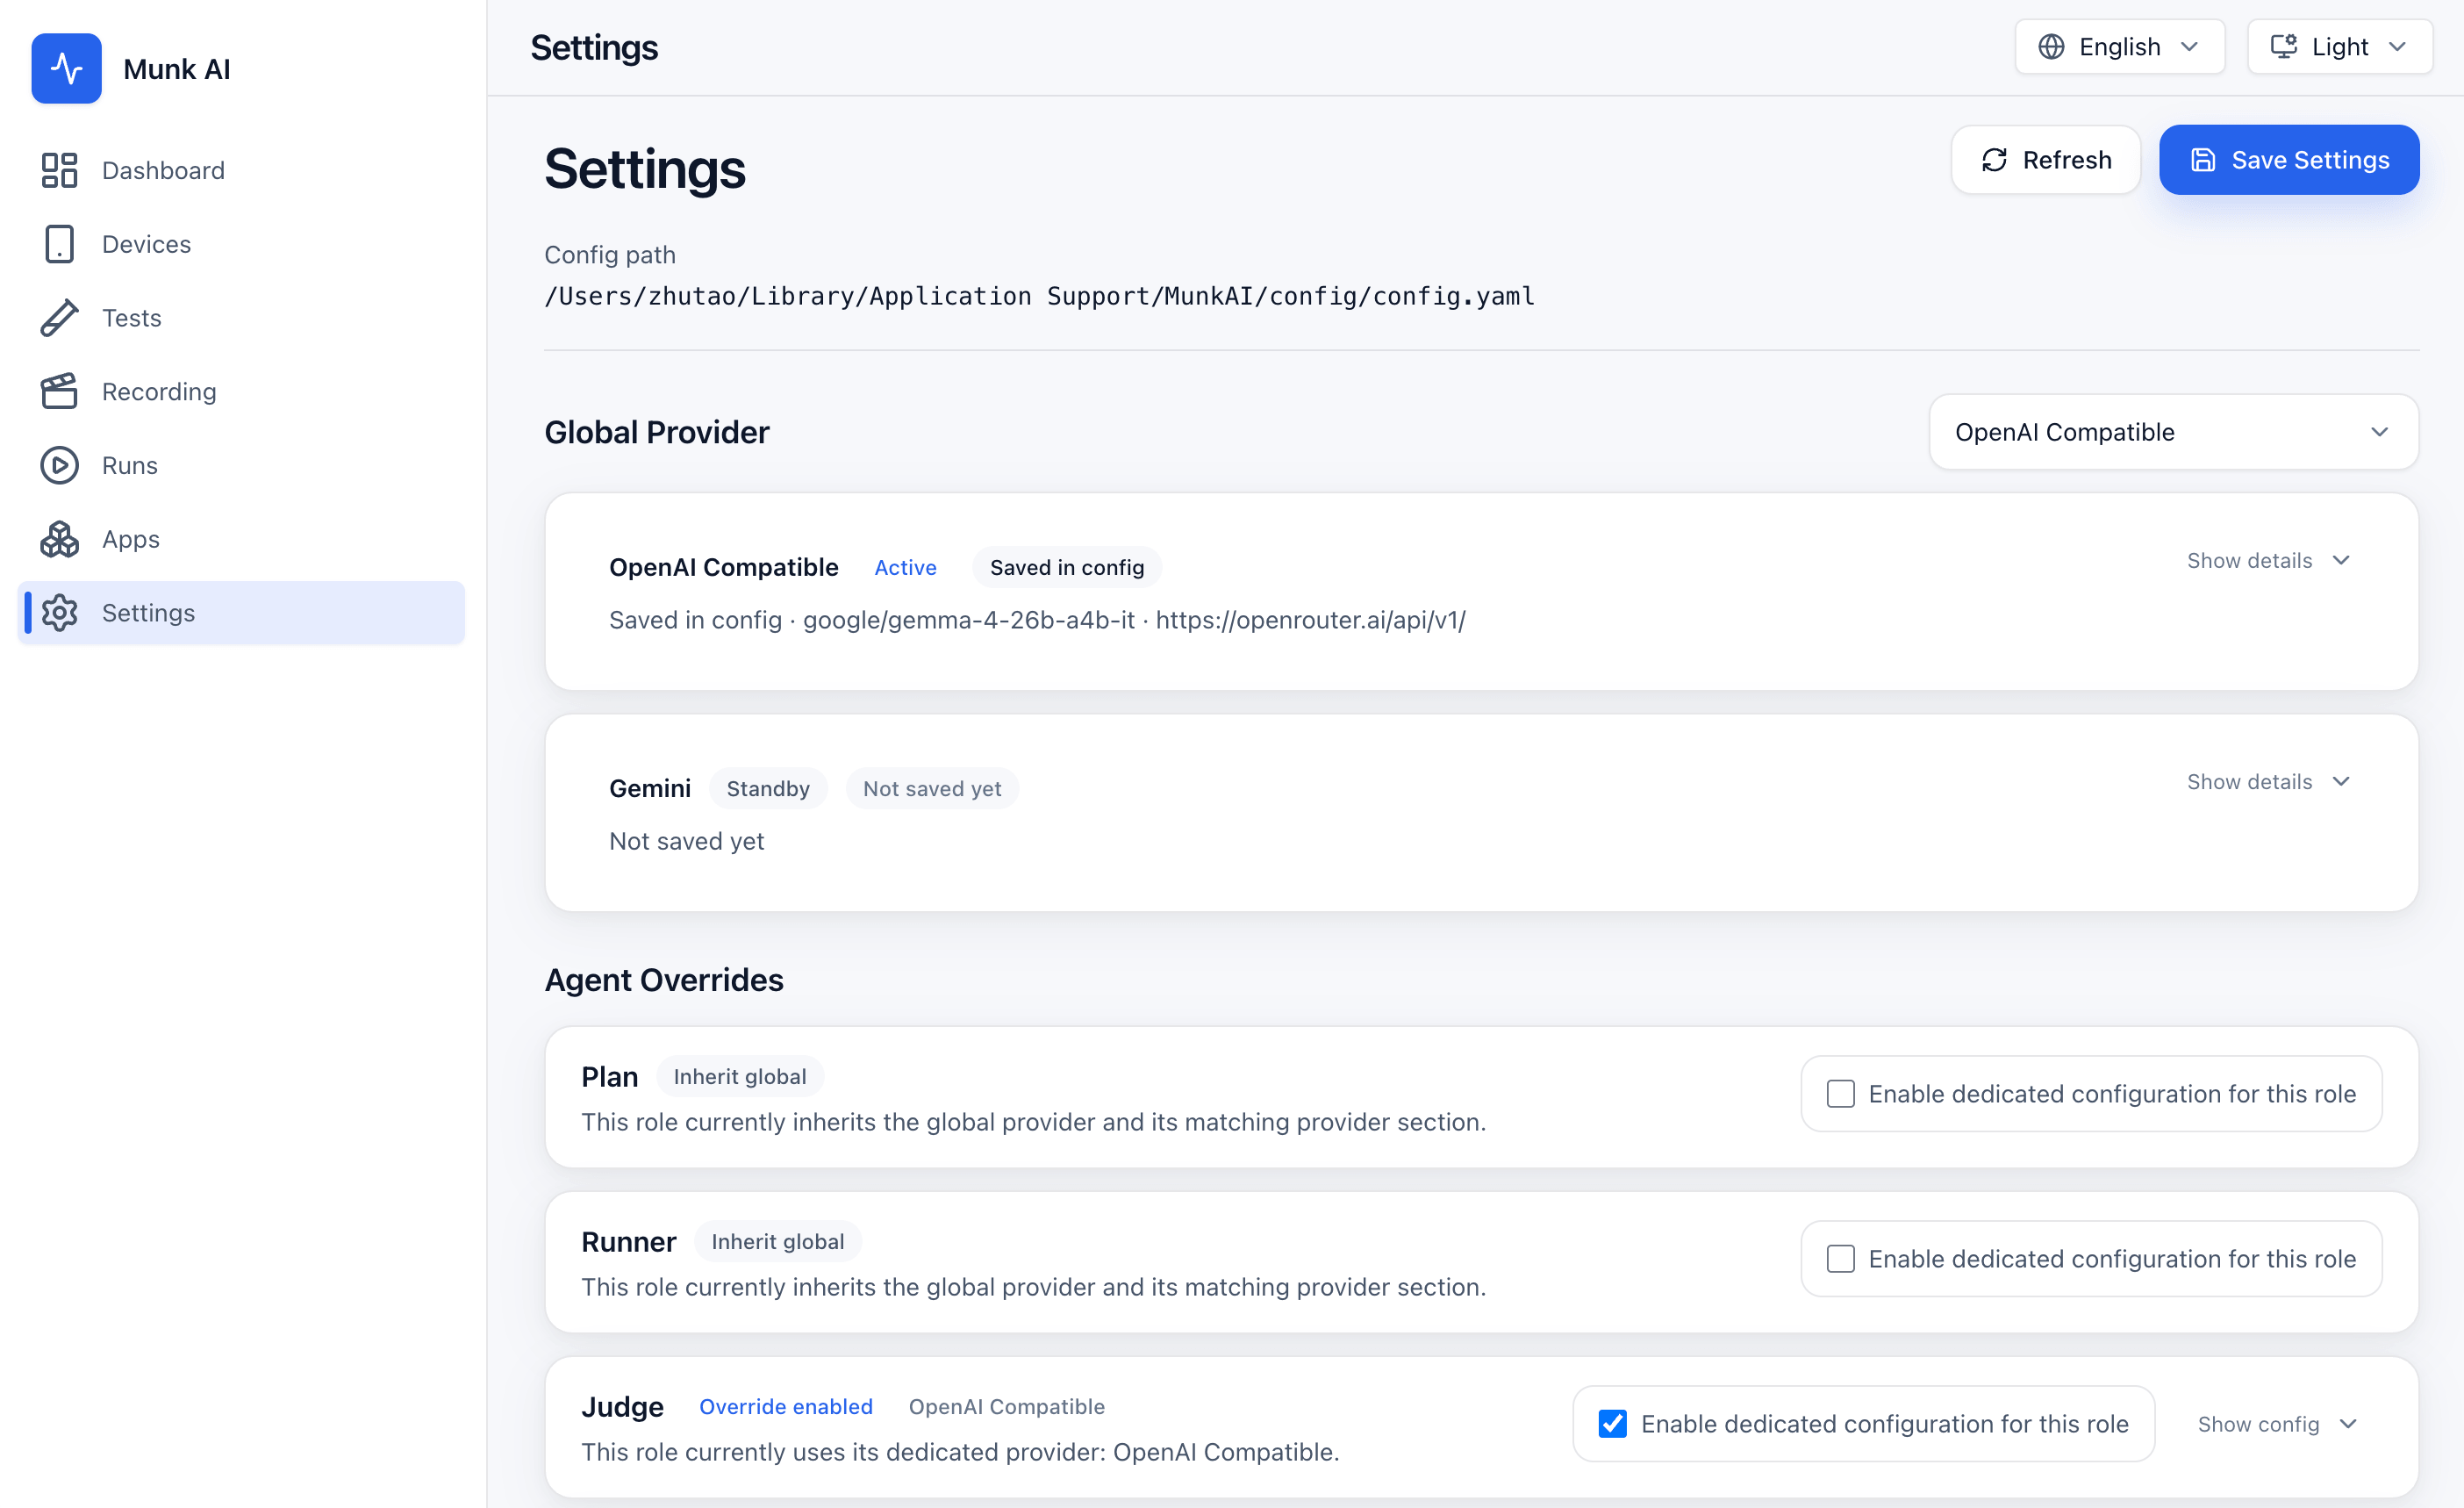
1. Complete your AI provider setup in Settings
After the Web UI opens, start with Settings. This is where you choose the default provider and fill in the core model connection fields such as base_url, model, and api_key. If needed, you can also add agent-level overrides and runtime defaults here.
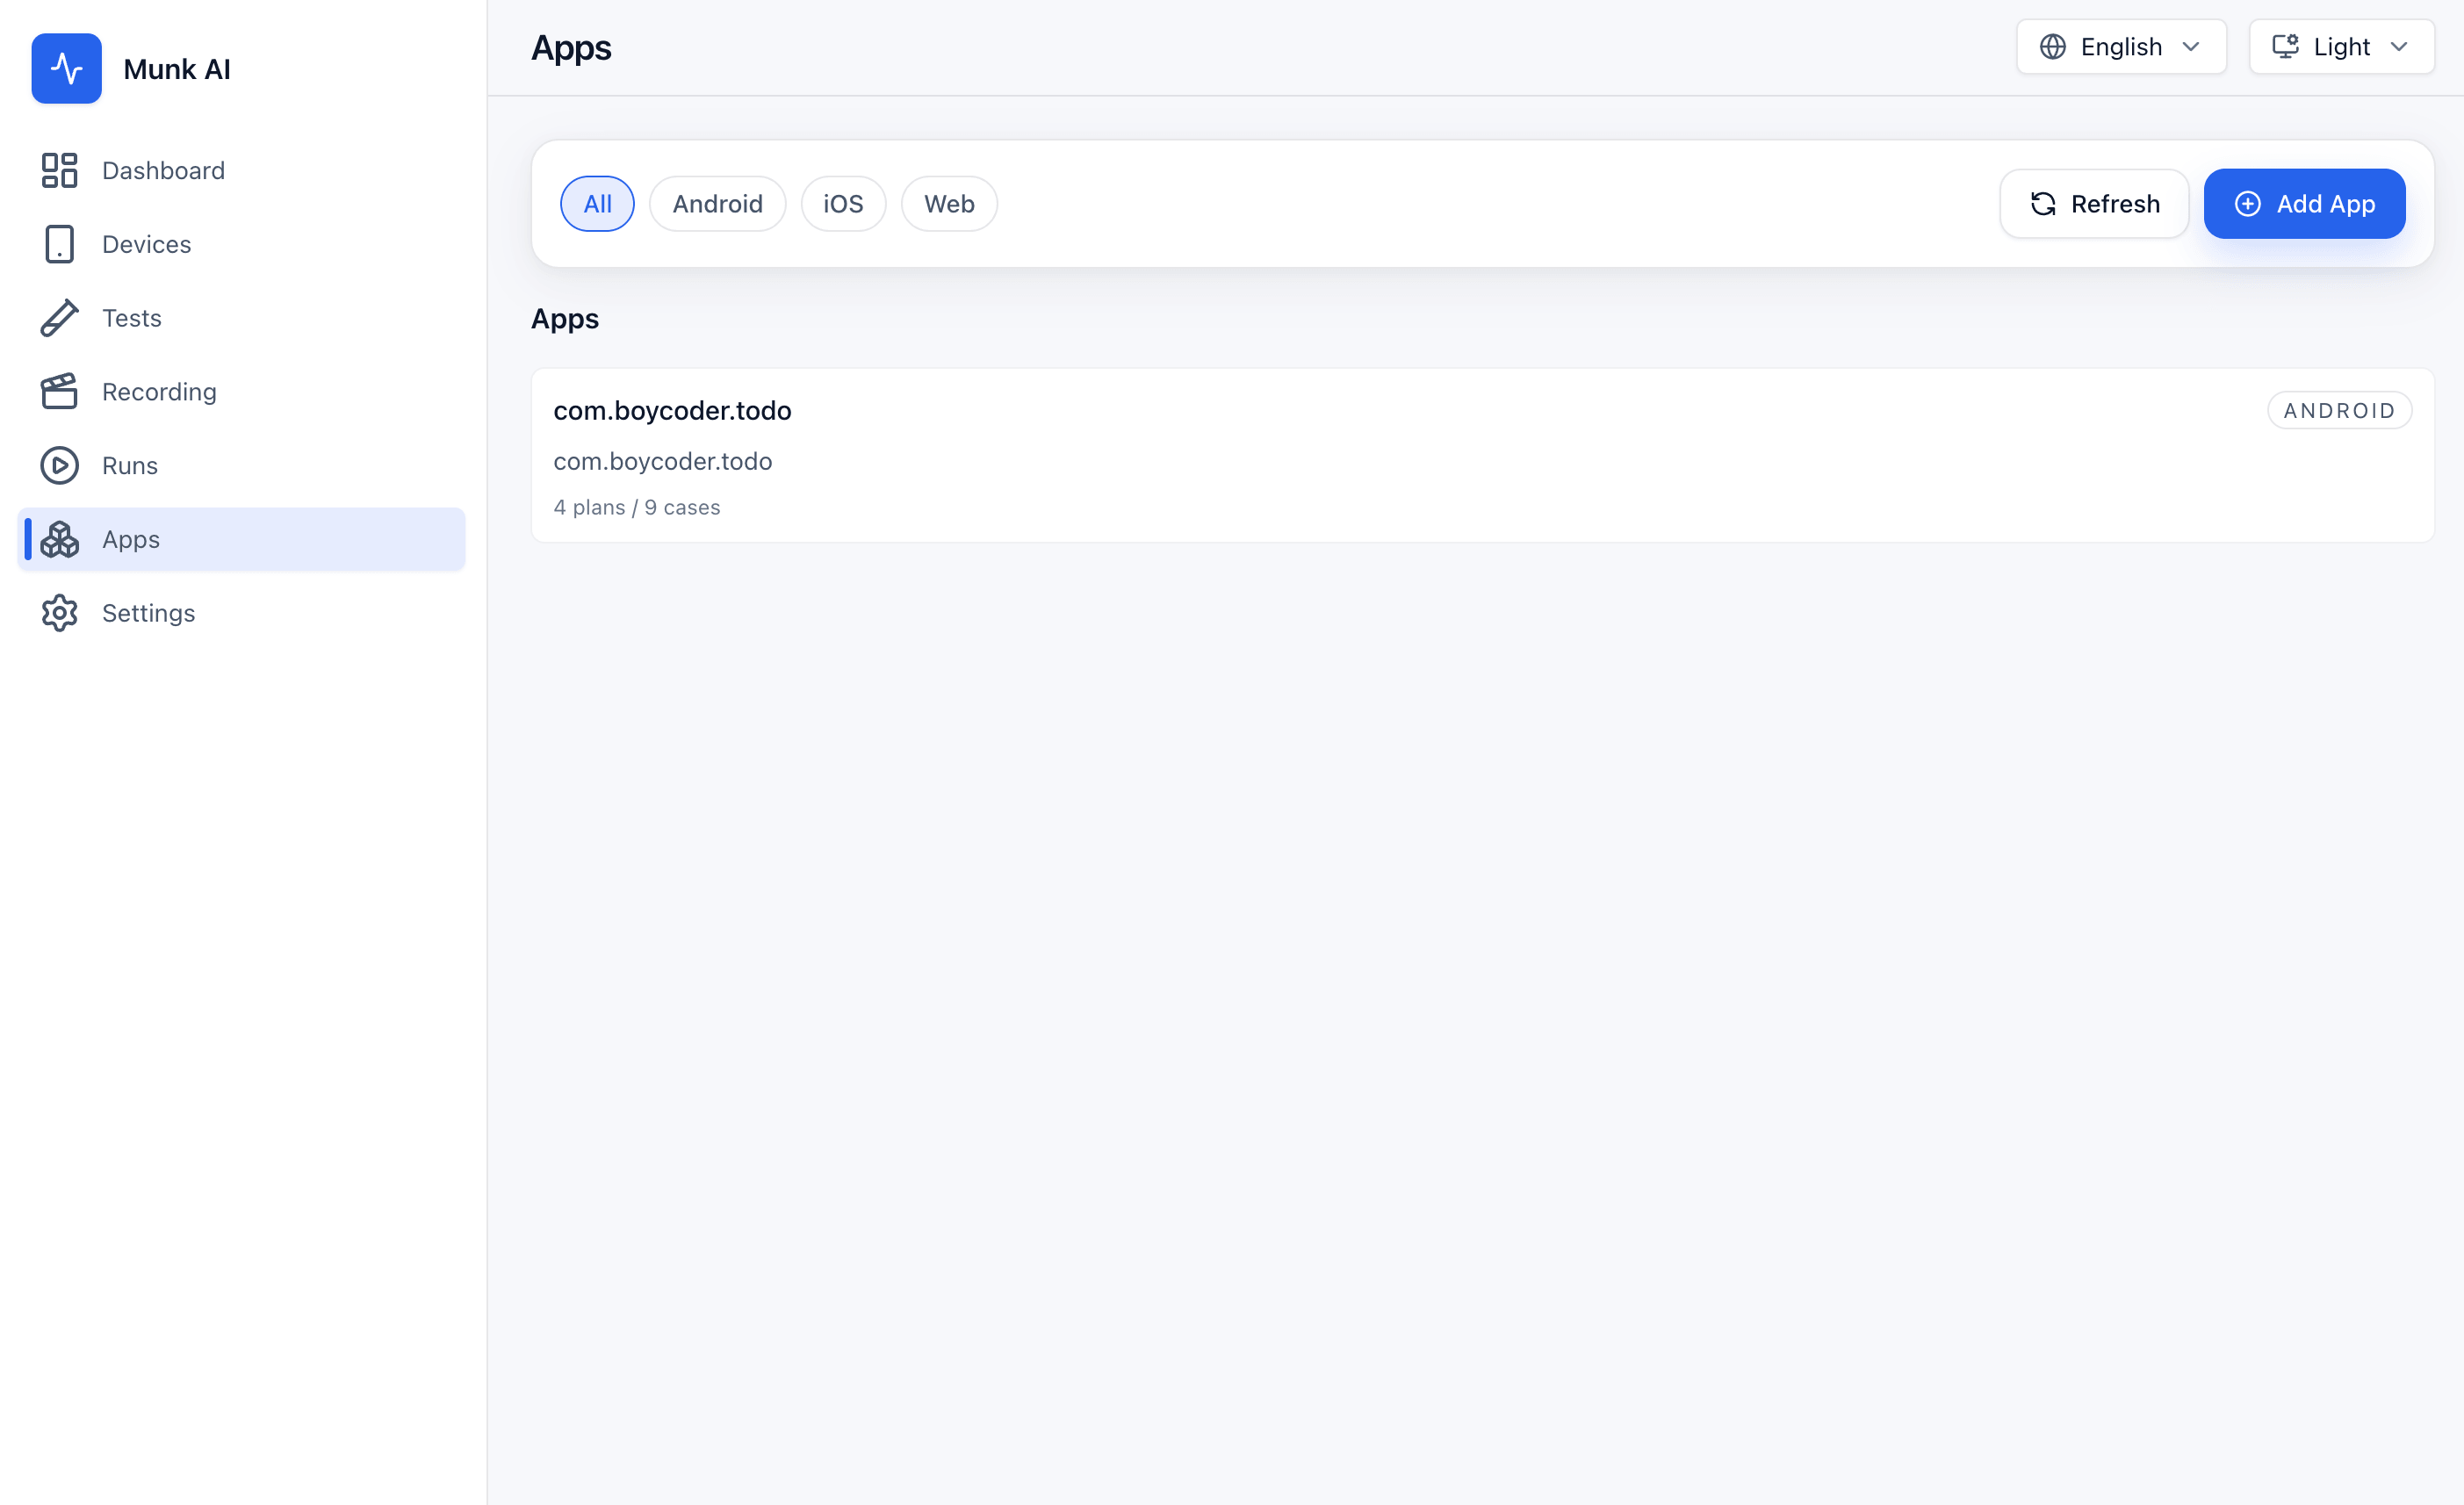
2. Create your first app in Apps
Once your model setup is ready, go to Apps and create your first app entry. This is the home for your long-lived test assets: you define the target app_id, platform, and basic app introduction, and later plans, cases, and runs are organized around that app.
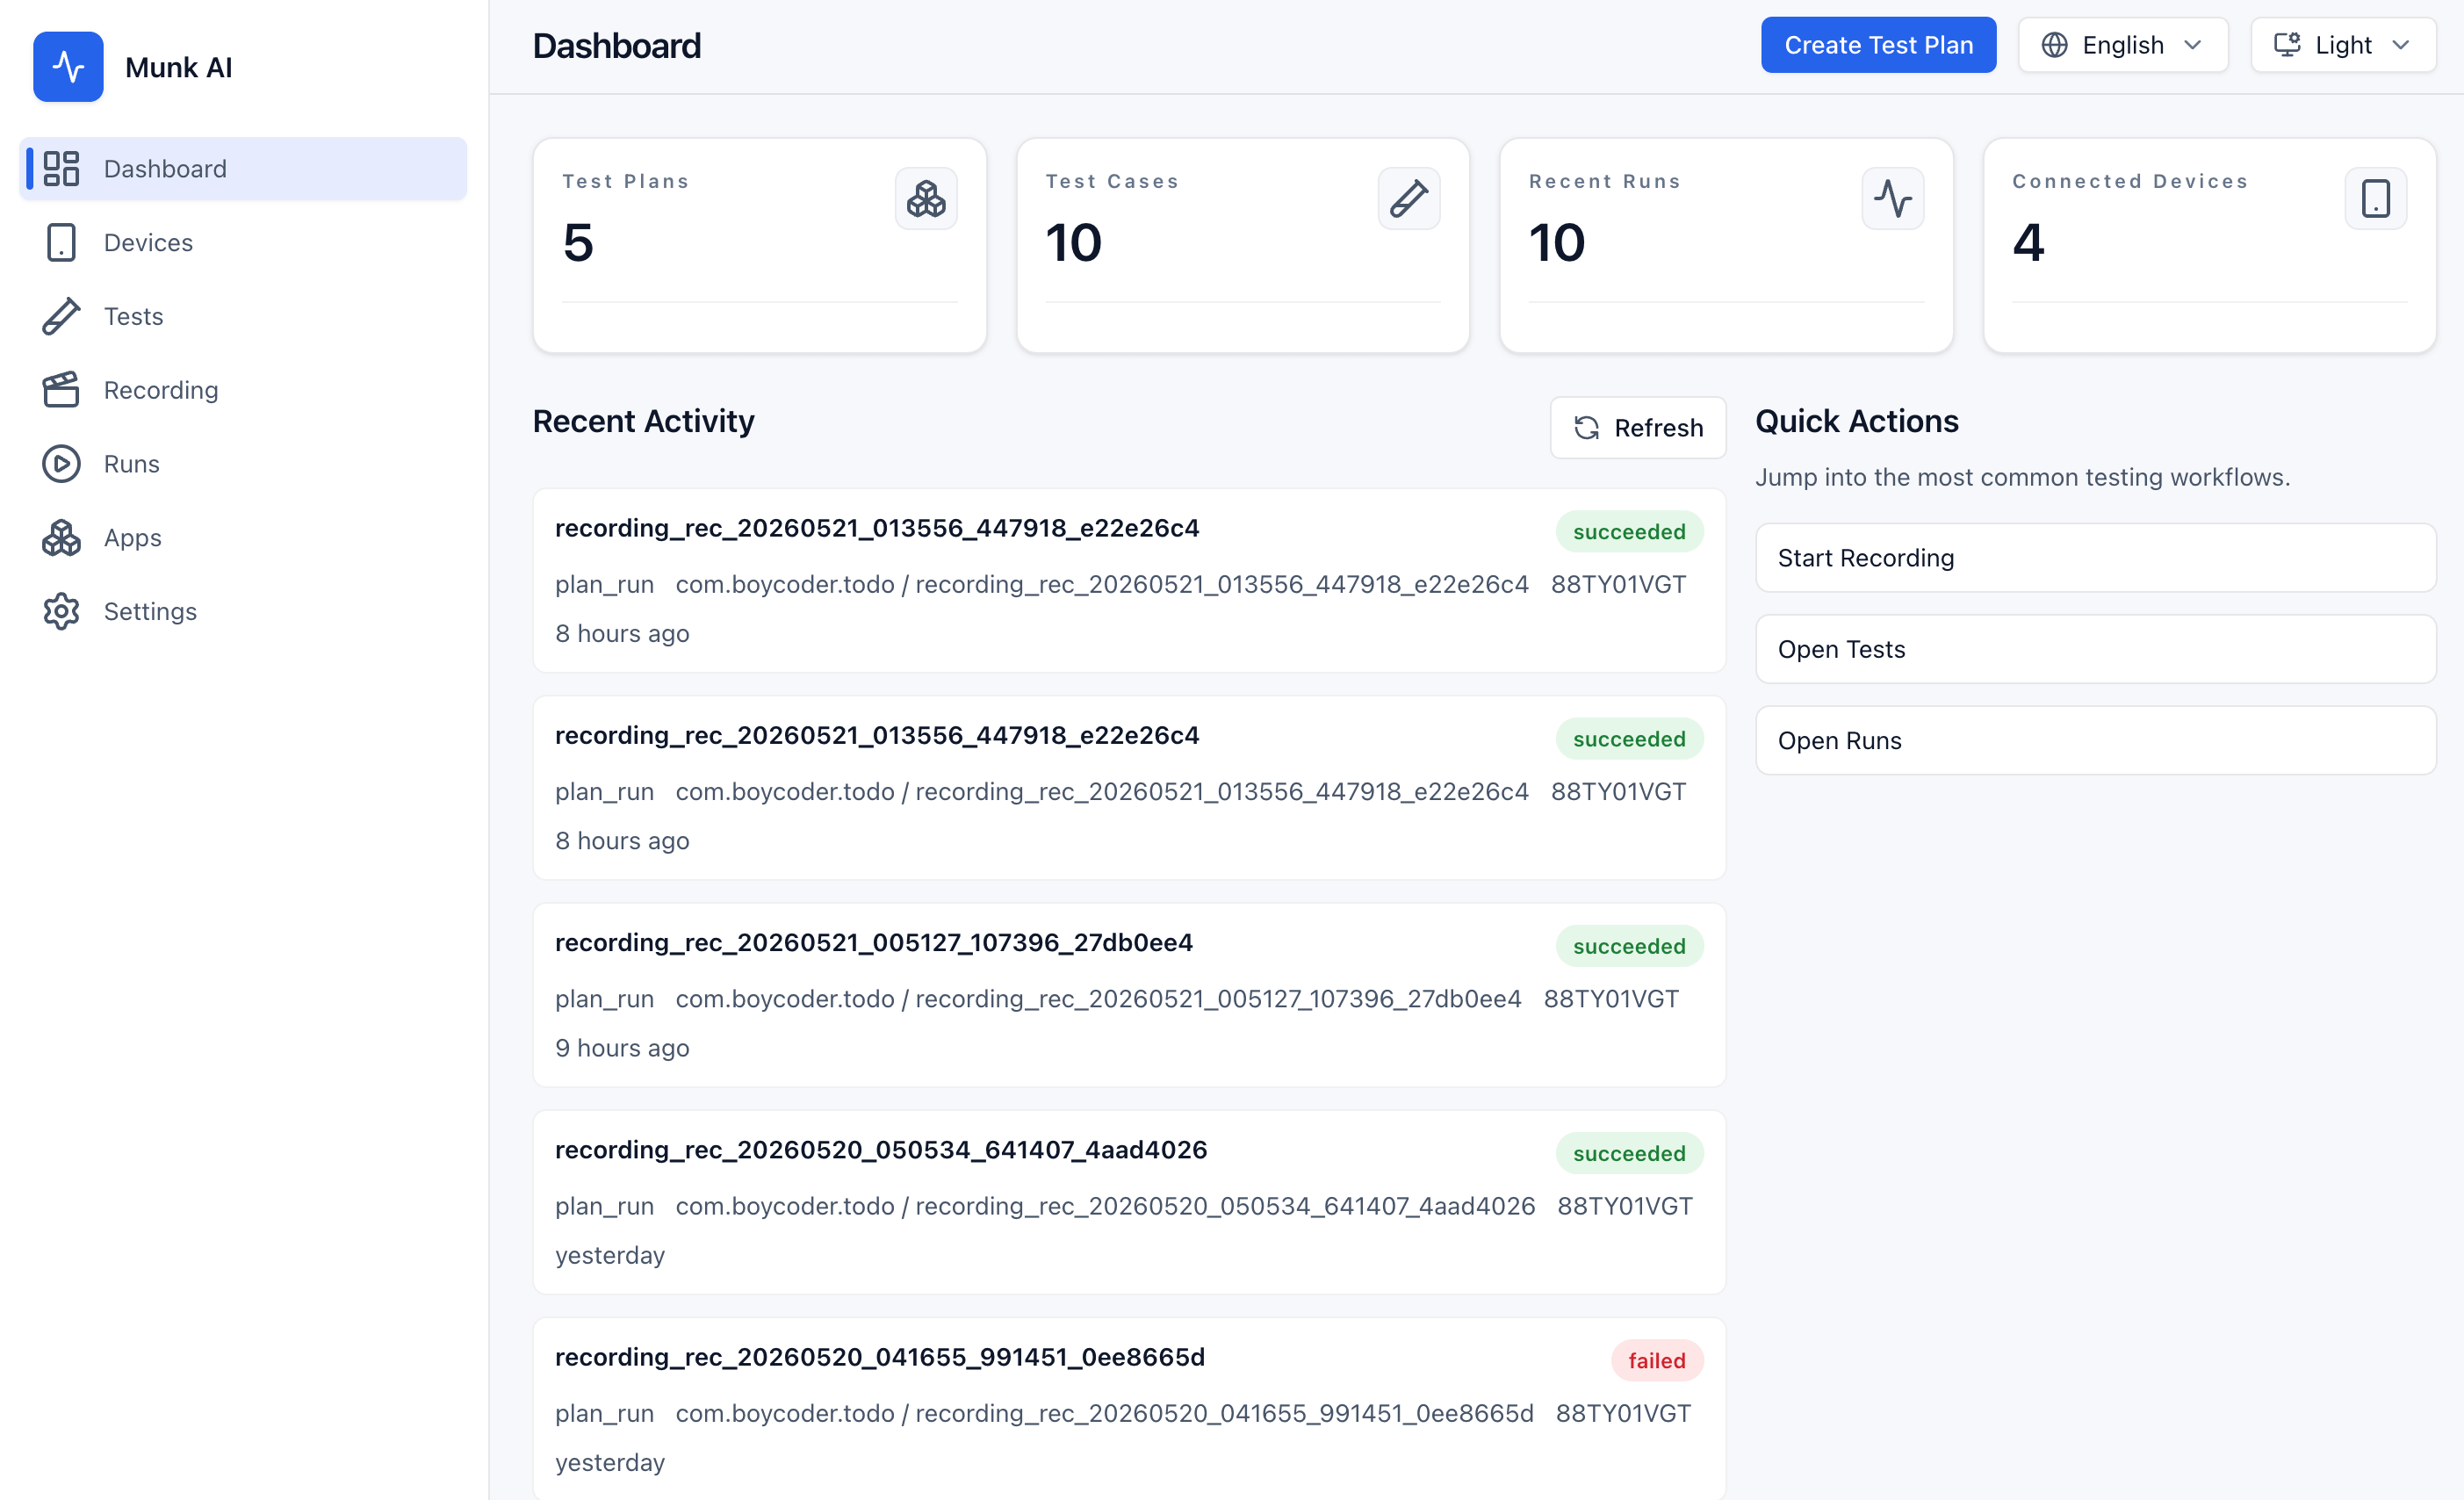
3. Return to the Dashboard and create your first test plan
Dashboard is the default home page. It gives you a quick summary of plans, cases, recent runs, and connected devices. For a first-time walkthrough, use the create-plan entry from here to start your first plan. The Run Tests button in the top-right corner opens the batch run and scheduled task screen—see Batch Runs and Scheduled Tasks.
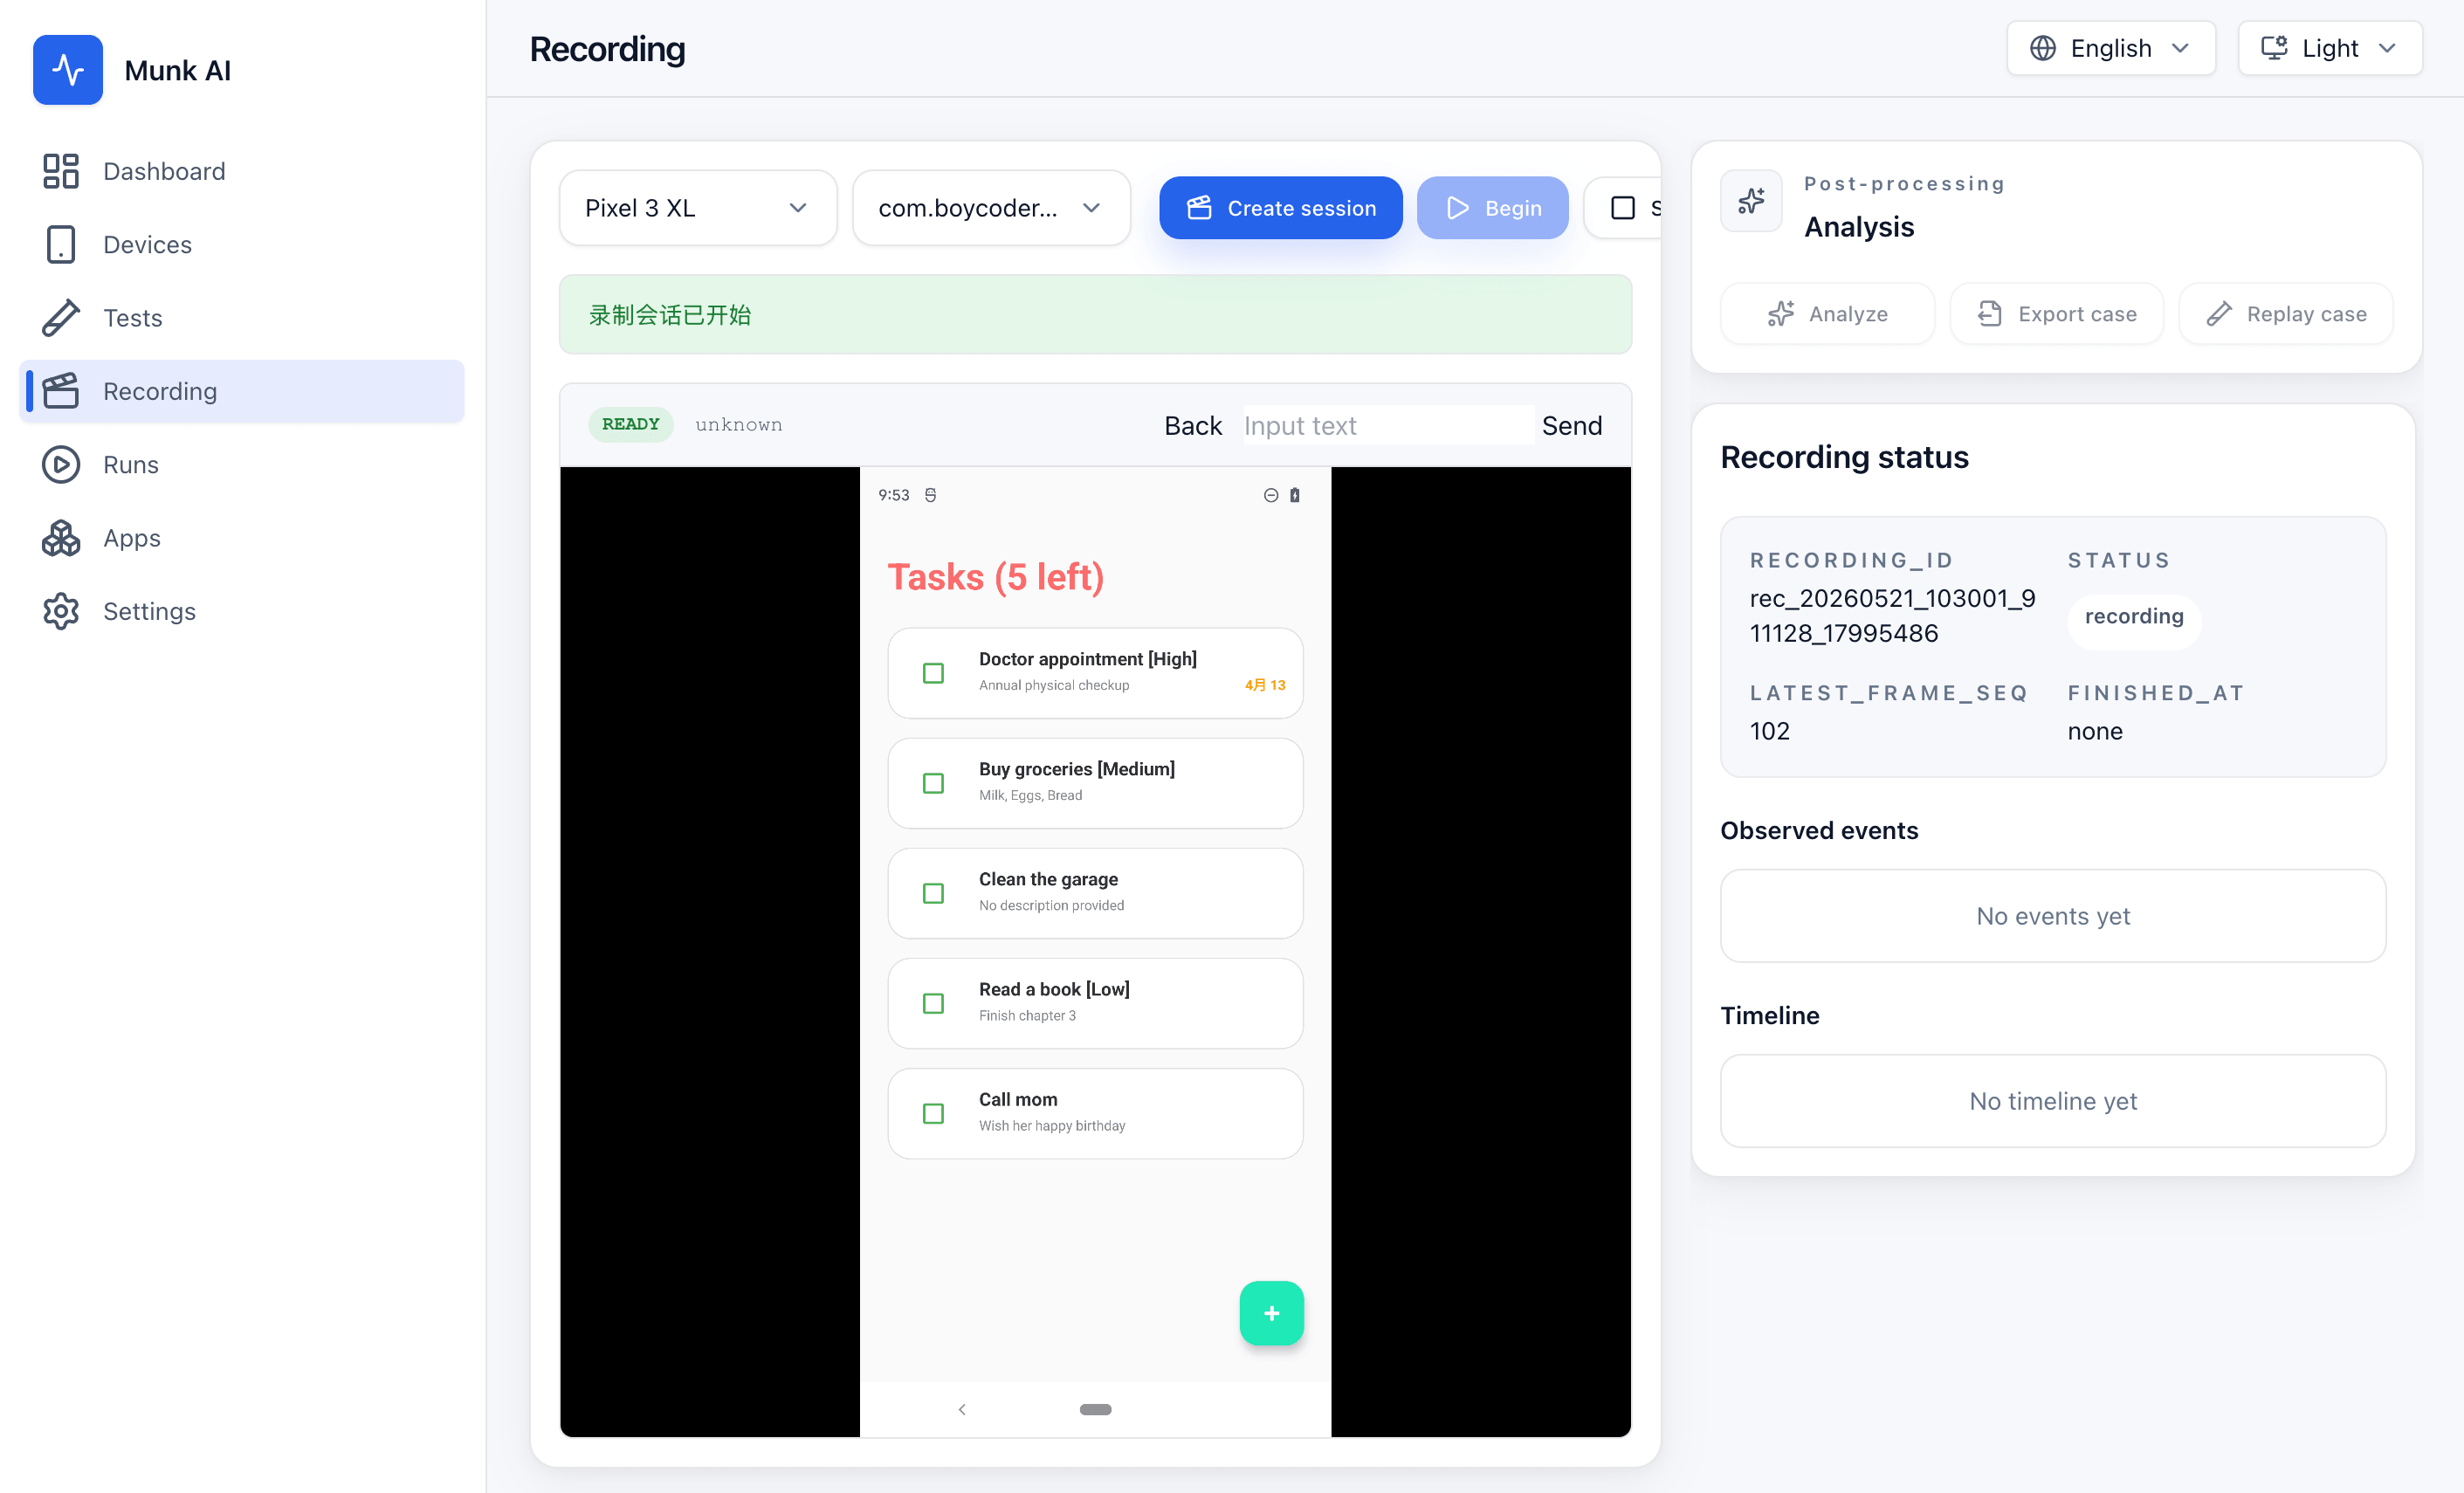
4. Or go to Recording and capture a test case
If you prefer to start from real interactions, open Recording instead. This workspace lets you connect a device, record a flow, analyze the captured session, and export the result as a formal test case that feeds back into the main testing workflow.
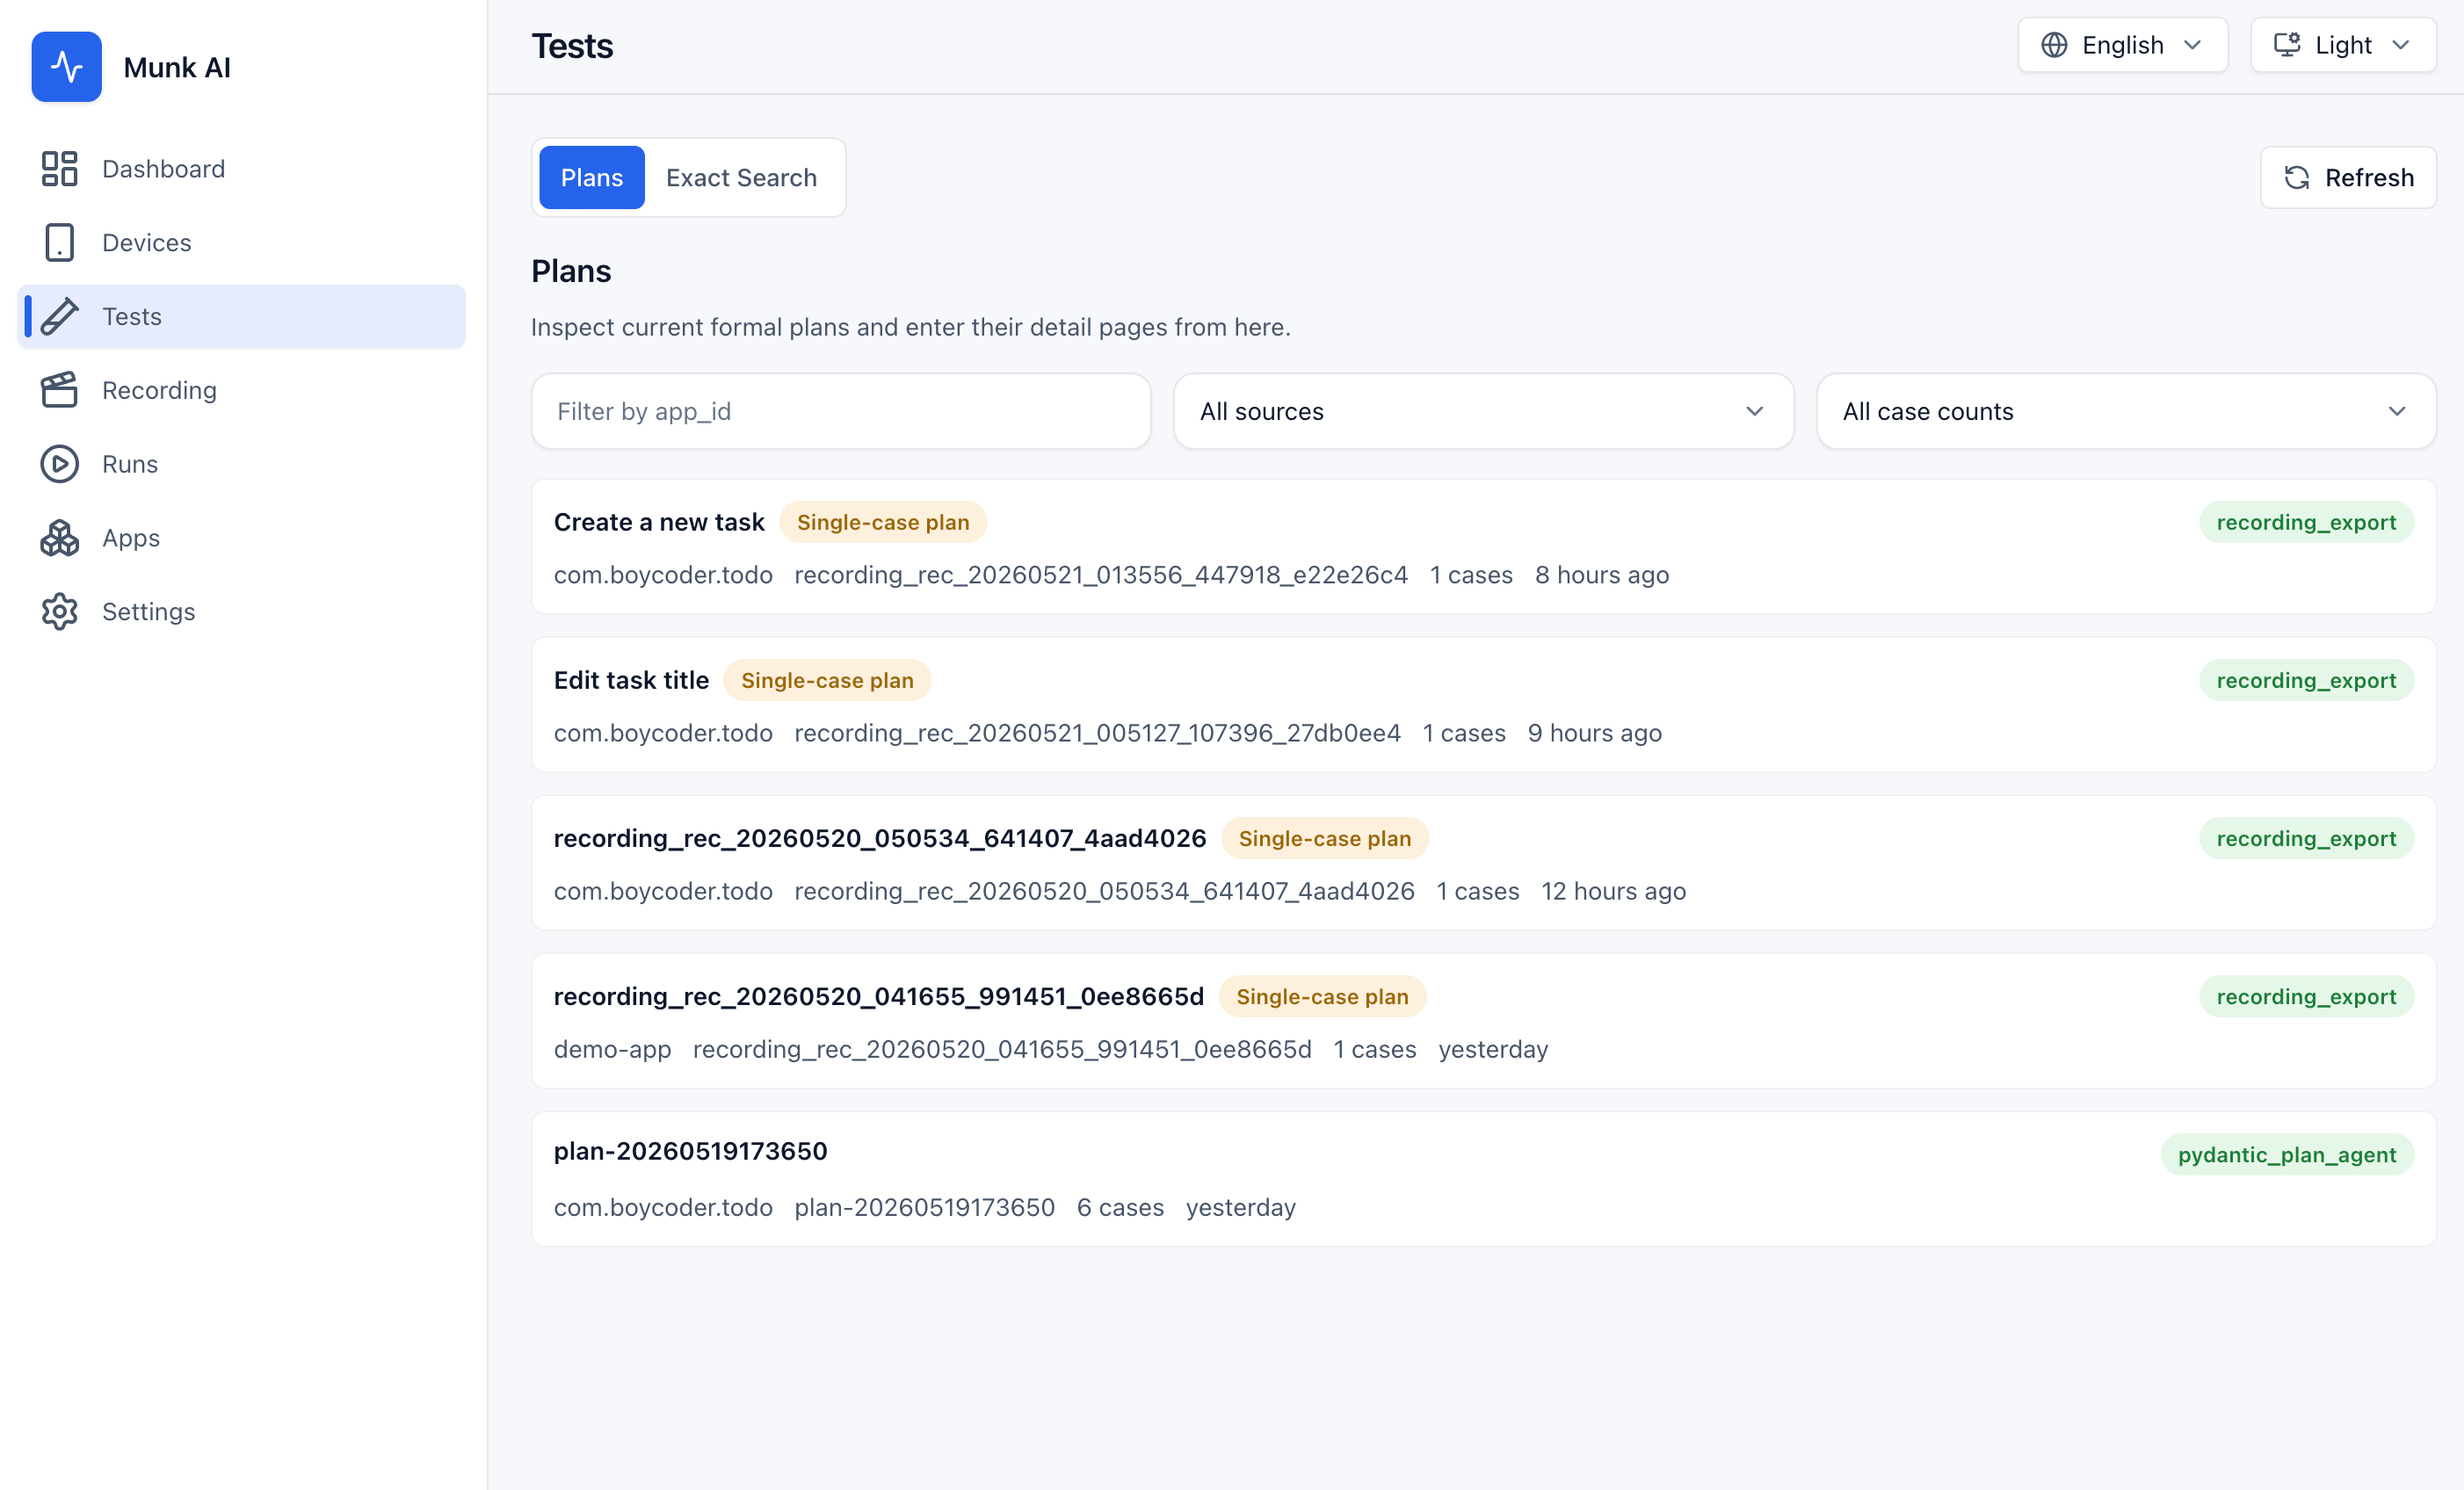
5. Use Tests to review plans and cases
The Tests page is the central place to browse and manage test assets. You can review generated plans, or switch to the search view and look up existing cases by app_id, plan_id, or case_id.
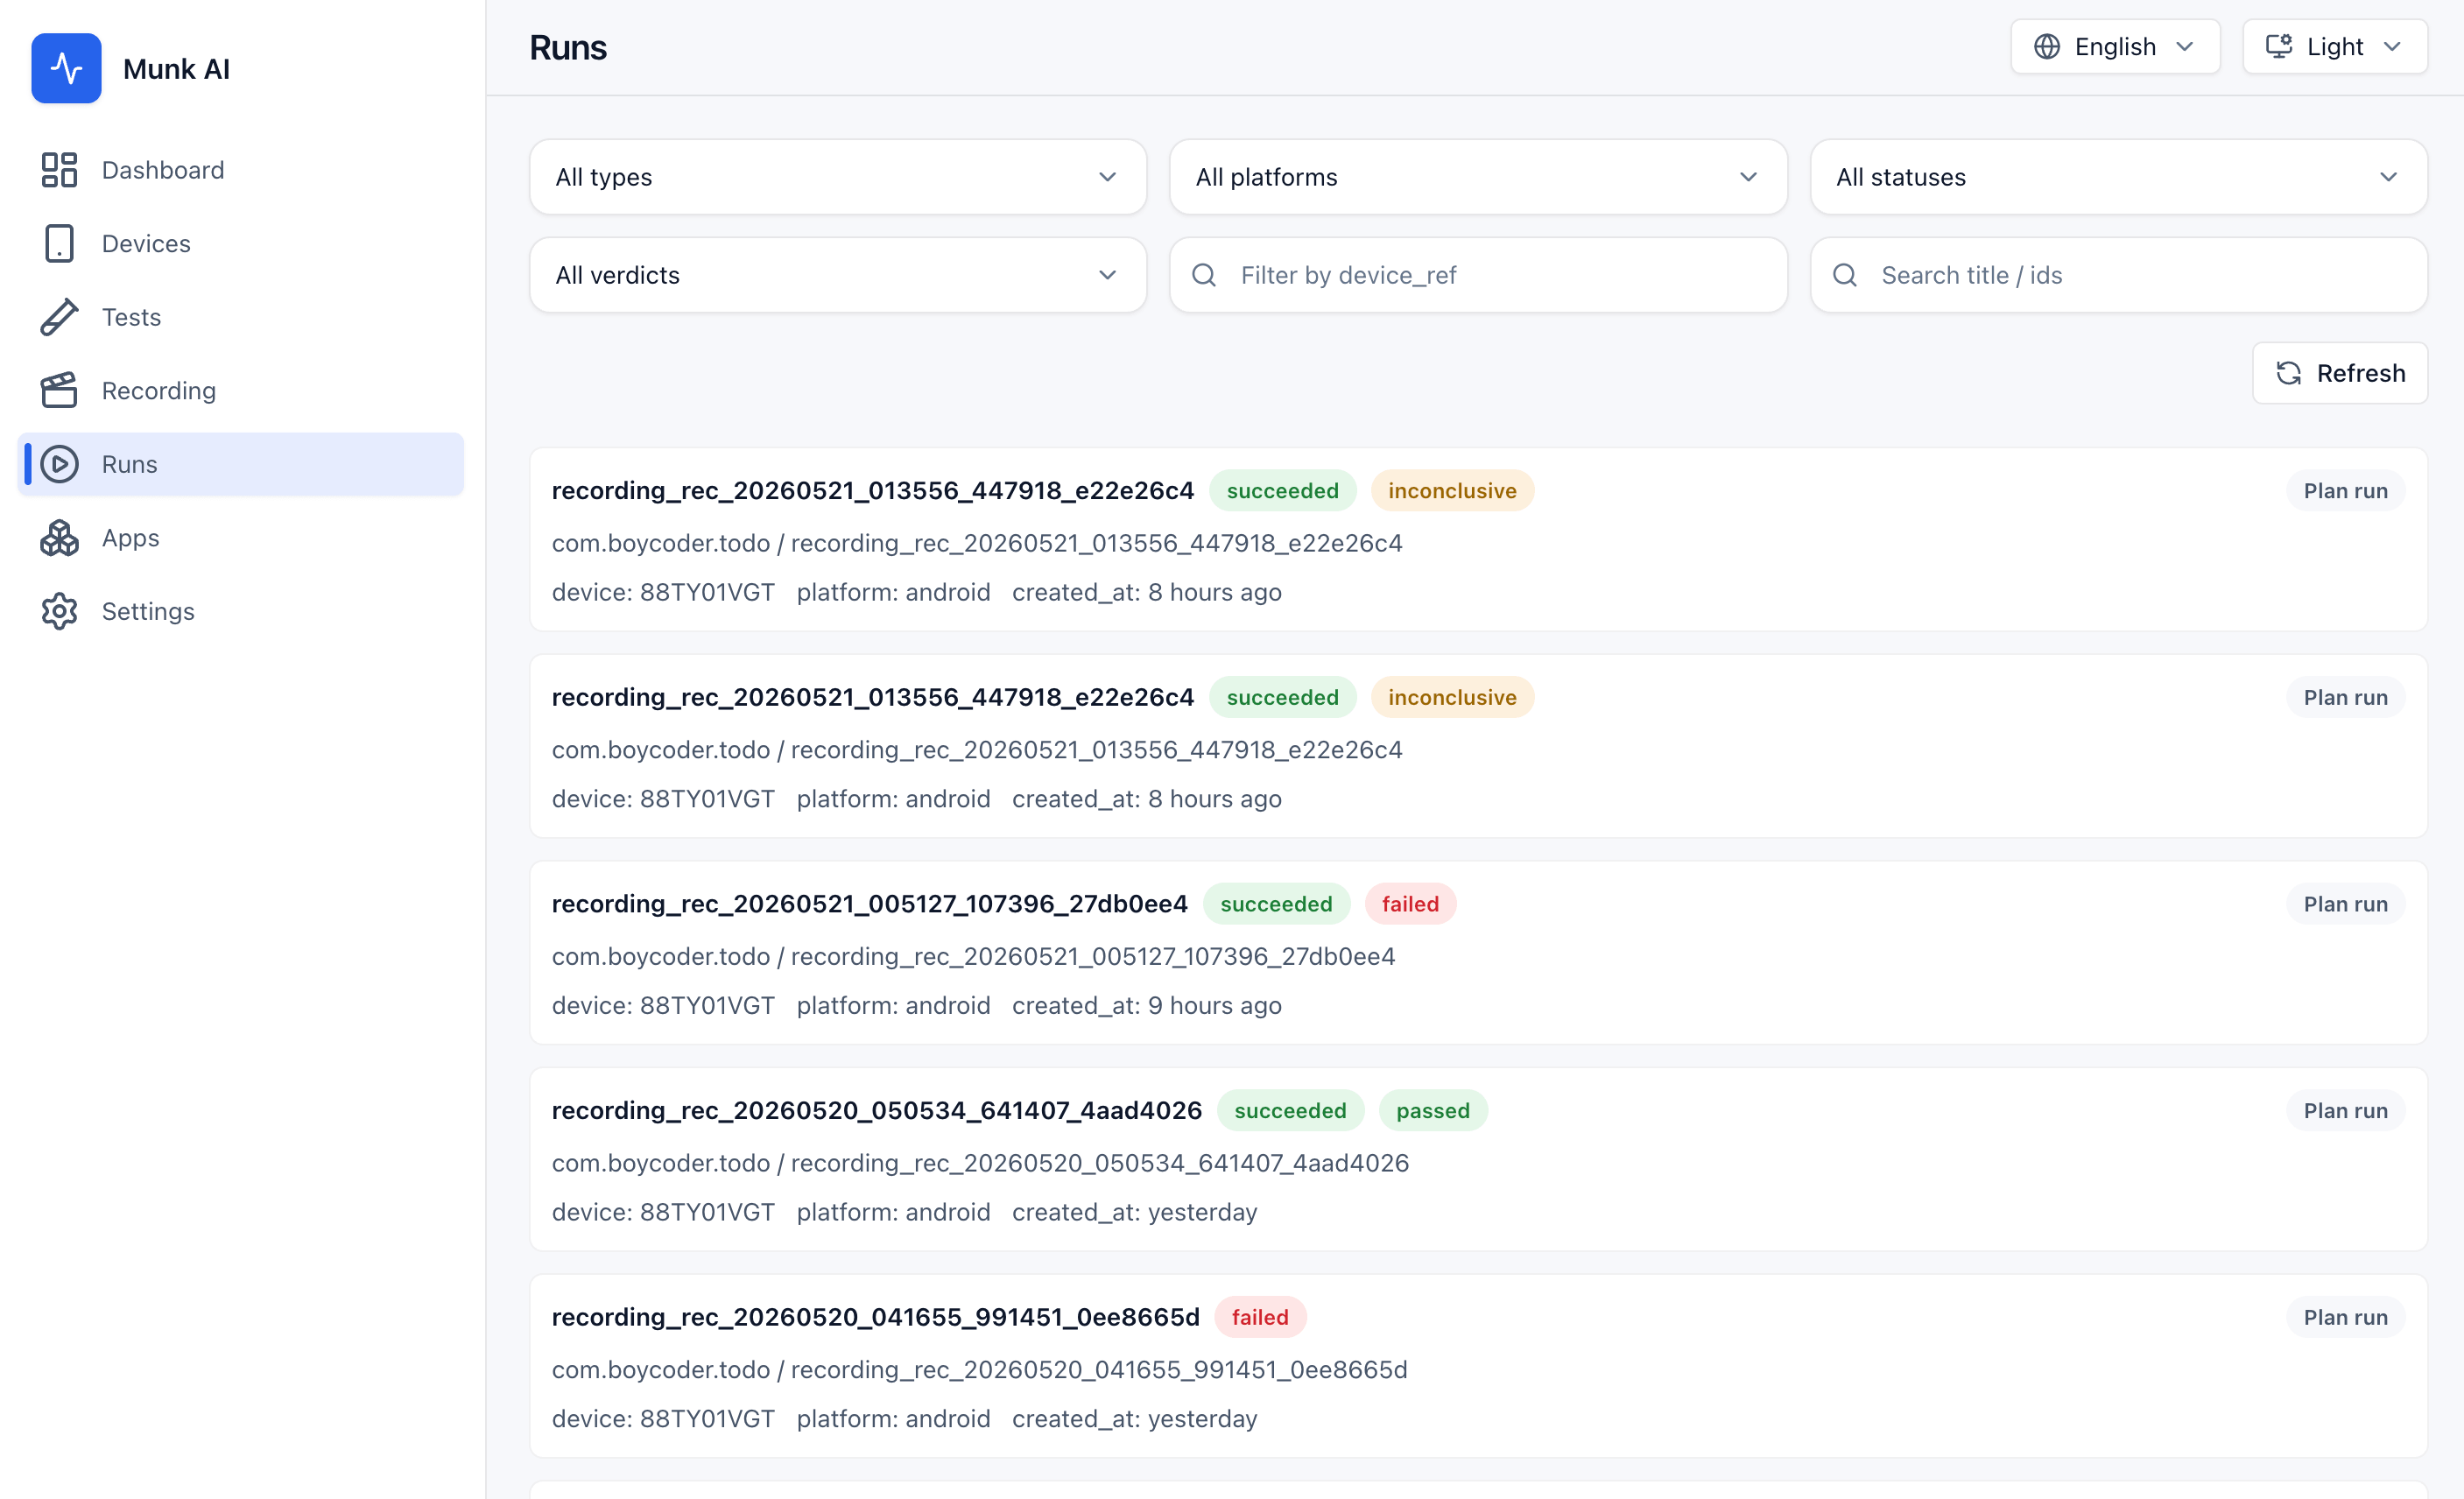
6. Use Runs to inspect execution history
When you start running run plan, verify change, or replay flows, the Runs page becomes the place to inspect execution history. You can filter by run type, platform, status, or verdict, then open an individual run for more detail.
Core commands
If you only remember a few commands at first, make them these:
munk doctor: checks whether your local runtime, dependencies, and basic environment are readymunk serve: starts the local API and Web UImunk plan: generates a structured test plan and cases, then stops at the planning phase by defaultmunk run plan: executes a plan that has already been reviewed or approvedmunk verify change: creates a verification plan around a code change; add--auto-runif you want to continue into execution
Minimal examples:
munk plan \
  --app-id app-1 \
  --requirement-doc /path/to/PRD.md \
  --technical-doc /path/to/TECHNICAL_DESIGN.md \
  --config /path/to/config.yaml
munk run plan \
  --app-id app-1 \
  --plan-id plan-20260518160714 \
  --package com.example.app \
  --serial <device-serial> \
  --config /path/to/config.yaml
munk verify change \
  --app-id app-1 \
  --change-summary "Fix task save flow" \
  --changed-file src/task.py \
  --config /path/to/config.yaml
Advanced configuration
Once you are ready to go deeper, Munk AI uses config.yaml to know:
- which model provider to use
- which model to call
- how to connect to that provider
- which runtime defaults to use for execution
Global config vs workspace config
Munk AI supports two common configuration scopes:
- global config
- workspace config
You can think about them like this:
- global config: your long-lived default setup
- workspace config: a project-specific override for model settings or runtime defaults
The default lookup order is:
MUNK_CONFIG.munk/config.yamlin the current workspaceconfig/config.yamlin the global config directory
That means:
- if
MUNK_CONFIGis set, it has the highest priority - if the current workspace already has
.munk/config.yaml, that workspace config is used first - if neither of those exists, Munk AI falls back to the global config
The default global config path is:
- macOS:
~/Library/Application Support/MunkAI/config/config.yaml - Linux:
${XDG_DATA_HOME:-~/.local/share}/munk/config/config.yaml - Windows:
%LOCALAPPDATA%/MunkAI/config/config.yaml
If you are just getting started, it is usually best to prepare one global config first. Add a workspace config later only when a specific project needs different models or execution defaults.
The structure of config.yaml
At a high level, the structure looks like this:
provider: <default provider name>

<provider name>:
  # provider-specific connection settings
  model: ...
  timeout_sec: ...

runtime:
  # optional execution defaults
  max_steps: 30
  max_seconds: 300

agents:
  # optional per-stage overrides, such as judge / review
The most important rule to remember is:
providerselects the default model configuration- the matching provider block contains that provider's connection settings
runtimeis optional and defines execution defaultsagentsis optional and lets you override models for specific stages
A minimal working example
If you use a local LM Studio compatible endpoint, a minimal config usually looks like this:
provider: openai_compatible

openai_compatible:
  base_url: "http://127.0.0.1:1234/v1"
  api_key: null
  model: "google/gemma-4-26b-a4b"
  timeout_sec: 300
If you use Gemini directly, it can look like this:
provider: gemini

gemini:
  api_key: "YOUR_GEMINI_API_KEY"
  model: "gemini-2.5-flash"
  timeout_sec: 120
Notes:
- execution workflows require a vision-capable model
base_url,api_key, andmodelare usually the most important fields- if you are new to the full schema, start with the minimal config first
A complete runtime example
If you want to configure execution defaults as well, add a full runtime block to config.yaml:
runtime:
  max_tokens: 8192
  temperature: 0.2
  max_steps: 30
  max_seconds: 300
  interval: 0.5
  max_side: 1024
  vl_max_side: 768
  icon_conf: 0.12
These values become the defaults for run case, run plan, and verify change. If you pass an explicit CLI flag, the CLI value overrides the config file.
You can read the fields like this:
max_tokens: maximum output tokens for a single model calltemperature: how deterministic or open-ended the model output should bemax_steps: maximum number of agent steps in one executionmax_seconds: maximum total duration for one executioninterval: delay in seconds between observation/action loopsmax_side: maximum image side length for general screenshot processingvl_max_side: maximum image side length sent to the vision-language modelicon_conf: confidence threshold for icon detection
If you are just getting started and are not sure how to tune these values, this default set is a good place to begin. You can adjust it later for longer flows, slower pages, or more complex UIs.
If you do not want to place it in the global or workspace default locations yet, you can also prepare a /path/to/config.yaml manually and pass it explicitly with --config /path/to/config.yaml.
Recommended next steps
Once you have completed a first run, continue with these guides:
- Core Concepts to understand how the product is organized
- Execution Workflows to choose between
run case,run plan, andverify change - Verify a Code Change if you want to validate a real implementation change
- Record and Replay if you want to capture and reuse interaction flows